Dual Boot Windows 10 and Xubuntu 20.04, Two Disks, LUKS
My laptop crashed. The replacement laptop comes with one 512GB SSD and one 2TB HDD. It is pre-installed with Windows 10 Home. As is common these days, the laptop uses UEFI booting.
This page contains my procedure for setting up dual booting Windows 10 and Ubuntu Linux, specifically Xubuntu 20.04, with LUKS encrypted filesystems and swap.
Disclaimer: I have run the procedure documented here on my computers several times successfully. I make no claim as to whether this procedure will work on yours, and I am not responsible for any damage to or negative outcomes on your computer equipment that arise from your actions.
Windows 10 Disks Setup
As installed, C: took up the whole of the SSD's usable space. There are two other partitions on the SSD, one for UEFI boot, and the other for Windows 10 recovery. As for the HDD, it comes partitioned into three drives: D, E and F, a suboptimal scheme.
The first thing is to repartition the disks. Run the Computer Management tool as administrator, and use the Disk Management tool. The following screenshot shows the resultant partitioning scheme:
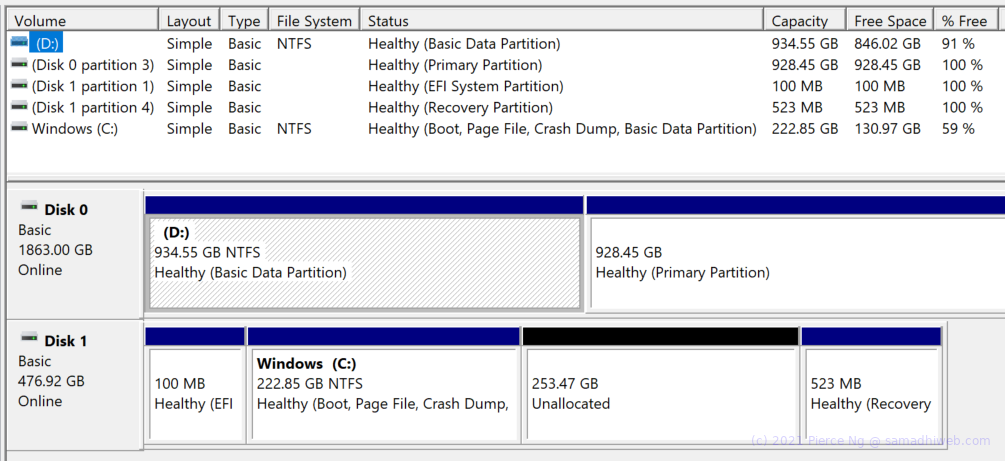
Disk 0 is the HDD. E: and F: are removed, and D: now takes up approximately half of the available disk space. Similarly, for disk 1, the SSD, C: has been resized to about 50% of the space it formerly occupied. The boot and recovery partitions are left untouched.
Booting Into Xubuntu 20.04
Prepare a USB drive with the Xubuntu ISO image and boot the computer with
it. At the boot prompt, choose "Test Xubuntu without Installing"; this
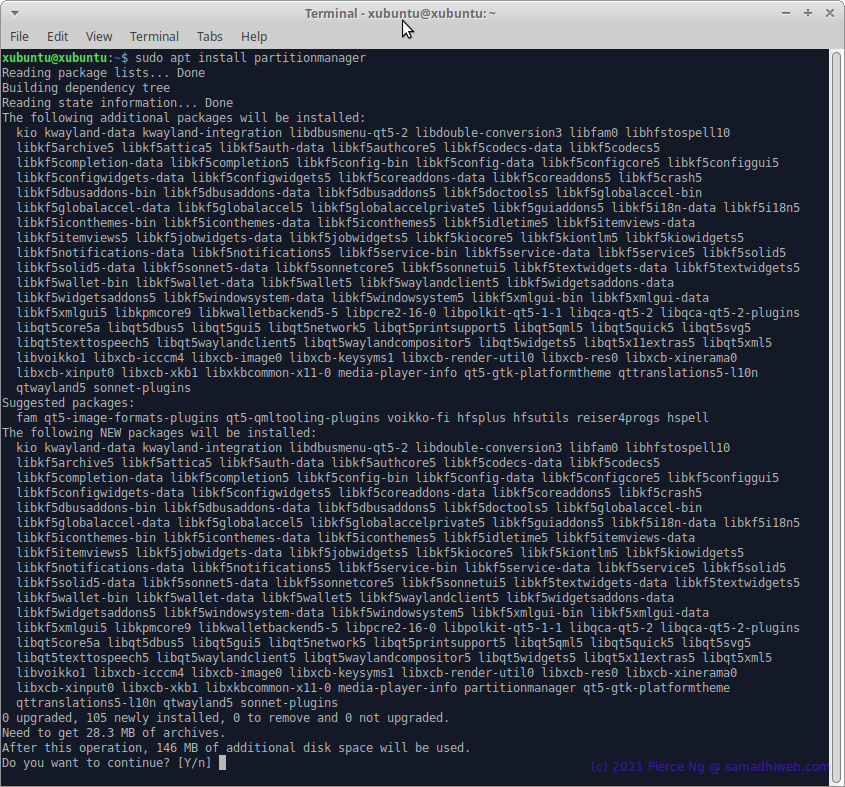
leaves you at the Xubuntu GUI. Open a shell terminal. In it, run the shell
command sudo apt install partitionmanager to install Partition
Manager so as to set up the disks in Linux.
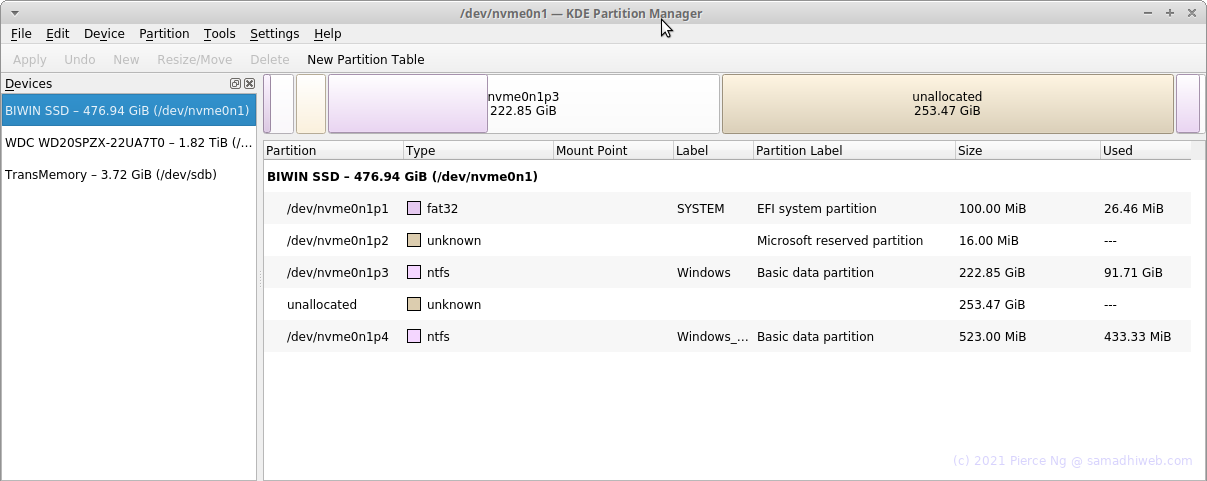
Once Partition Manager is installed, start it as root: sudo partitionmanager. Below screenshot shows the SSD partitioning as seen
by Partition Manager:
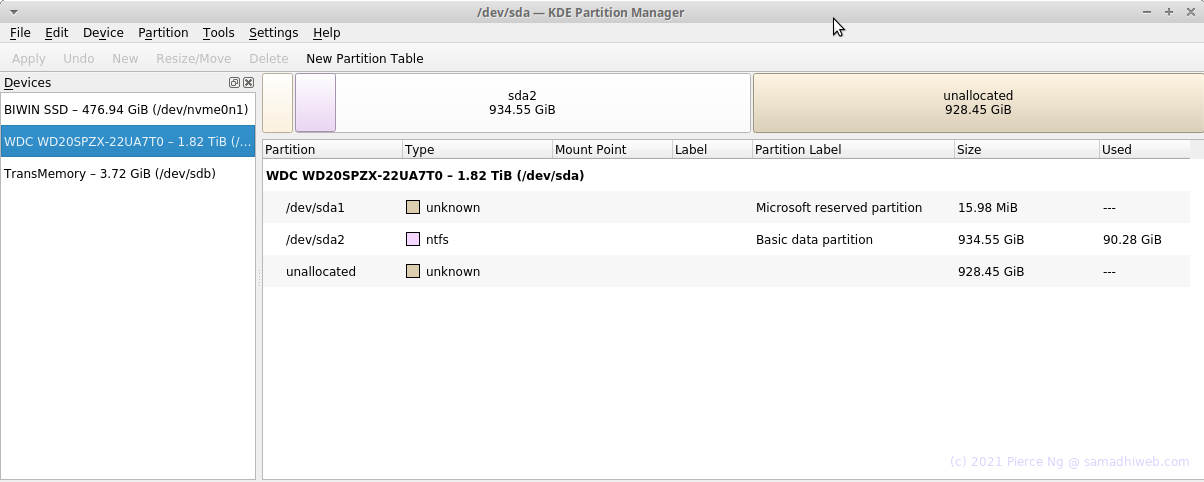
Next screenshot shows the HDD partitioning:
Linux Disks Setup
Boot Partition on SSD
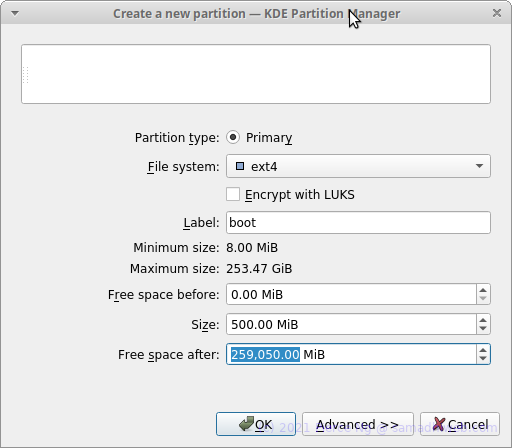
Now begin to set up the disks for Linux. First, create a new primary
partition on SSD for boot, setting filesystem type to ext4.
This partition should be at least 500MB, larger if you expect to be
experimenting with different kernels.
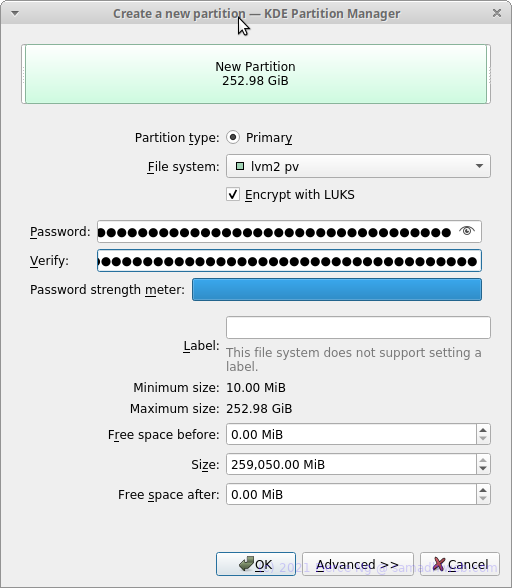
Encrypted Root Partition on SSD
Next, create a new primary partition on SSD for root, setting
filesystem type to lvm2 pv, meaning an LVM physical volume. Check
"Encrypt with LUKS" and enter a passphrase twice; the disk cipher key will
be derived from this passphrase. Click on the eye icon in the "Password"
entry box to display the passphrase you have typed. Remember the
passphrase. If you forget then the content of the partition will no
longer be inaccessible. In terms of size, use all the available space.
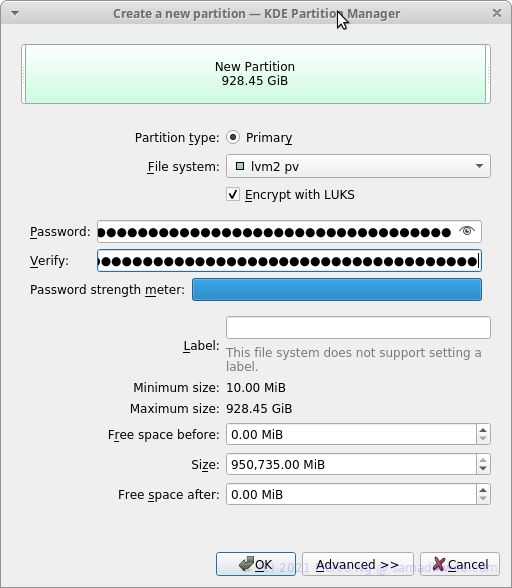
Encrypted "All Else" Partition on HDD
Finally, create a new primary partition on HDD. Again set filesystem type
to lvm2 pv, and check "Encrypt with LUKS". You may use the same
passphrase as for the SSD root partition, or you may choose a
different passphrase. When all is set up, everytime Linux boots you have to
enter the passphrase(s) to unlock the partitions. Use all available space
for the partition.
SSD Partitioning
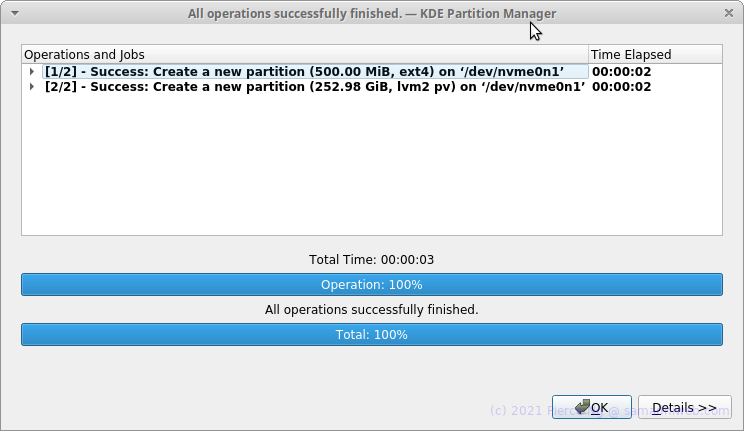
Below screenshot shows the planned partitioning for SSD. Click "Apply", then click "Apply Pending Operations" to proceed.
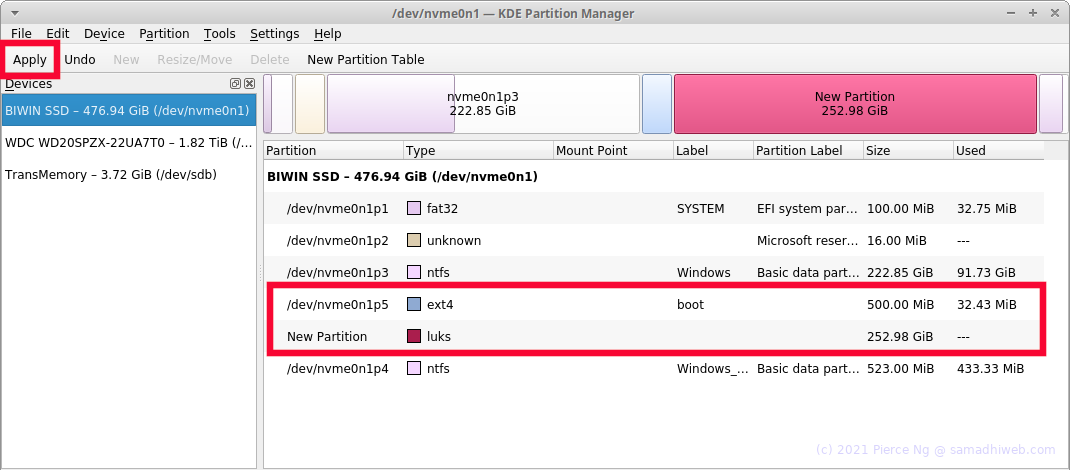
Outcome:
HDD Partitioning
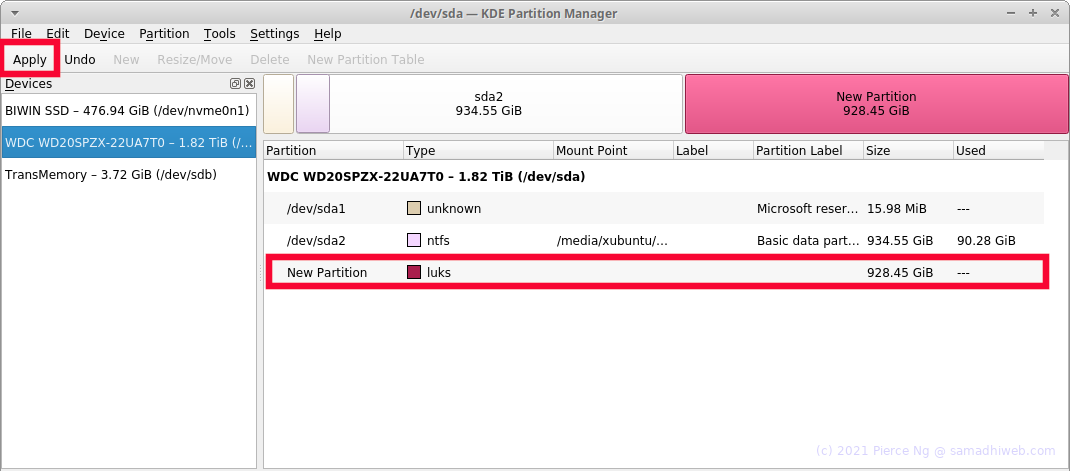
Next screenshot shows the planned HDD partitioning. Again, click "Apply", then click "Apply Pending Operations" to proceed.
LVM - Create VGs in PVs
Now that partitioning is completed, exit Partition Manager and go back to
the shell terminal. The next step is to create LVM volume groups (VGs).
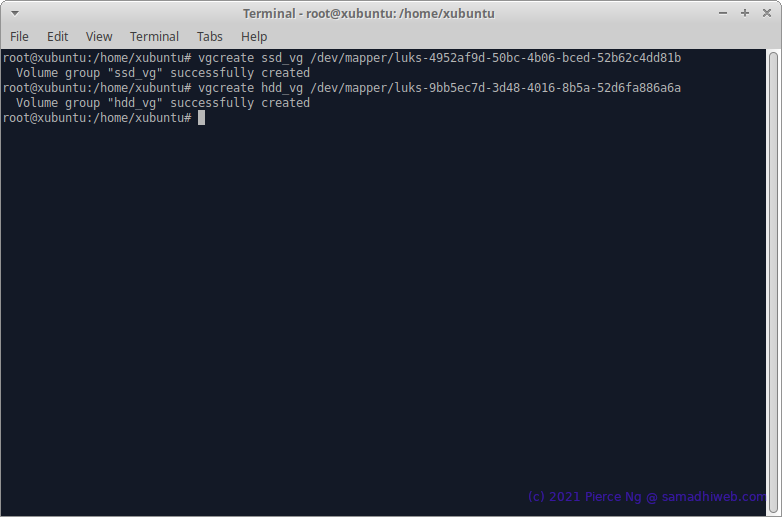
First, execute sudo bash to become root, then ls -l /dev/mapper/luks-* to identify the LUKS PVs. Then, execute vgcreate ssd_vg /dev/mapper/luks-XXX-YYY-SSD-UUID to create a VG named
ssd_vg in the SSD's LUKS PV, replacing XXX-YYY-SSD-UUID with
the correct UUID for your setup. Similarly create a VG named hdd_vg
for the HDD.
LVM - Create LVs in VGs
Next, create LVM logical volumes (LVs). The ssd_vg is intended for
the root filesystem, therefore assign it all available space in the VG. In
the hdd_vg, I have allocated 20GB for swap, 256GB for
/var, 2GB for /tmp, and the remaining free space for
/home; adjust to your taste.

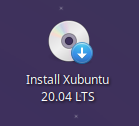
Graphical Installer Go!
Finally we are ready to start installation. Double click on the "Install Xubuntu 20.04 LTS" icon found on the GUI desktop:
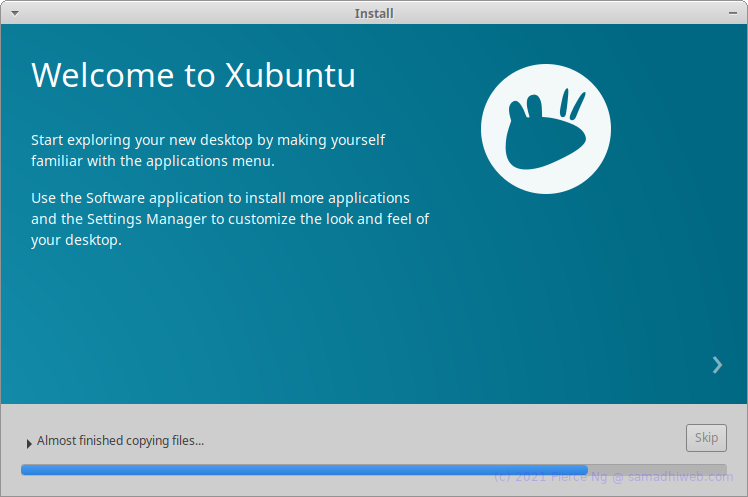
First screen is "Welcome":
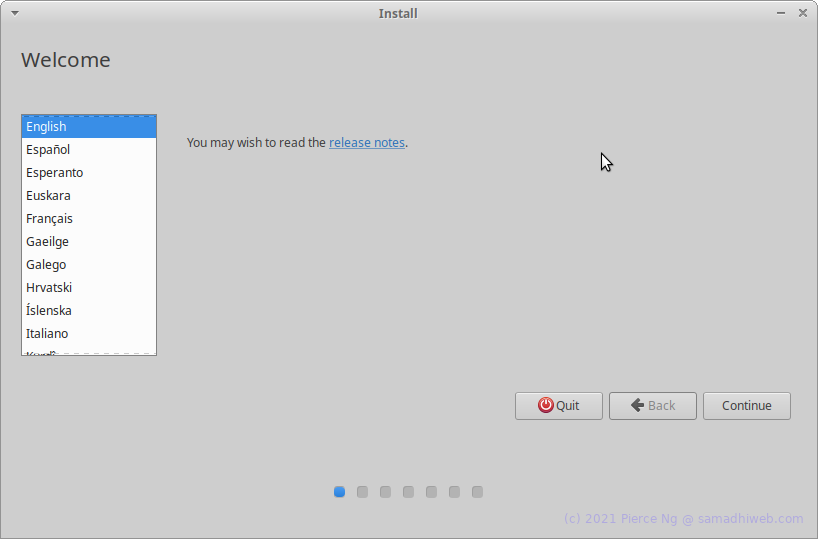
Click "Continue" and carry on. If you have done this before, then the next few screens will be familiar. At some point you will be prompted to unmount partitions that were automatically mounted earlier. Click "Yes".

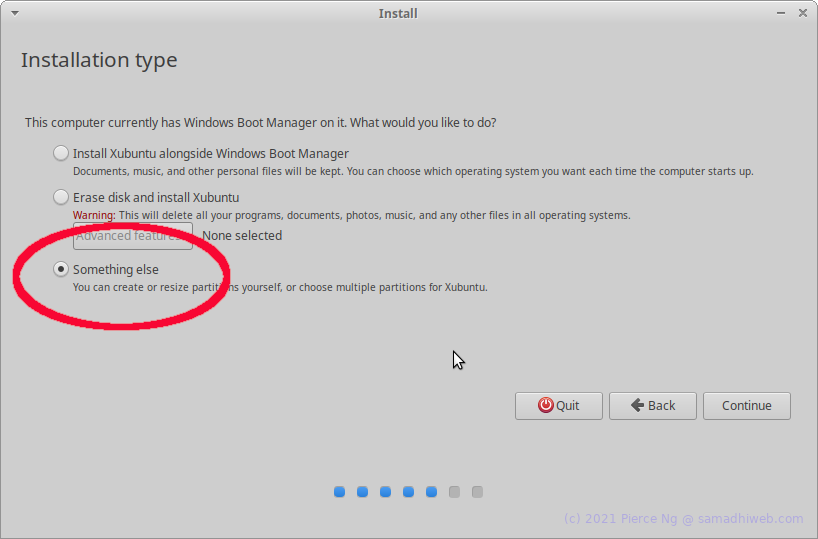
The next screen asks for installation type. Choose "Something else" to make use of the partitioning and LVM setup that has been done:
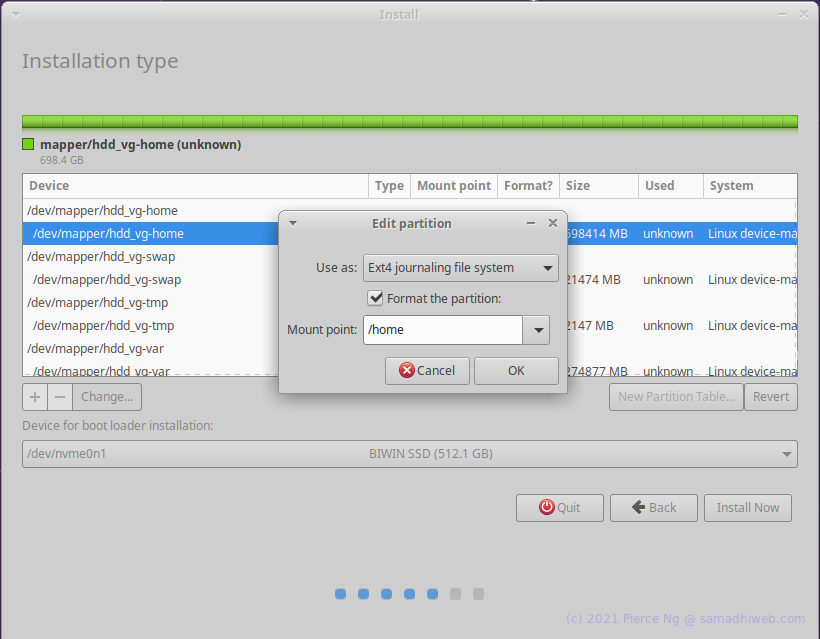
With the LVM LVs, proceed to create filesystems. First, on HDD, for /home:
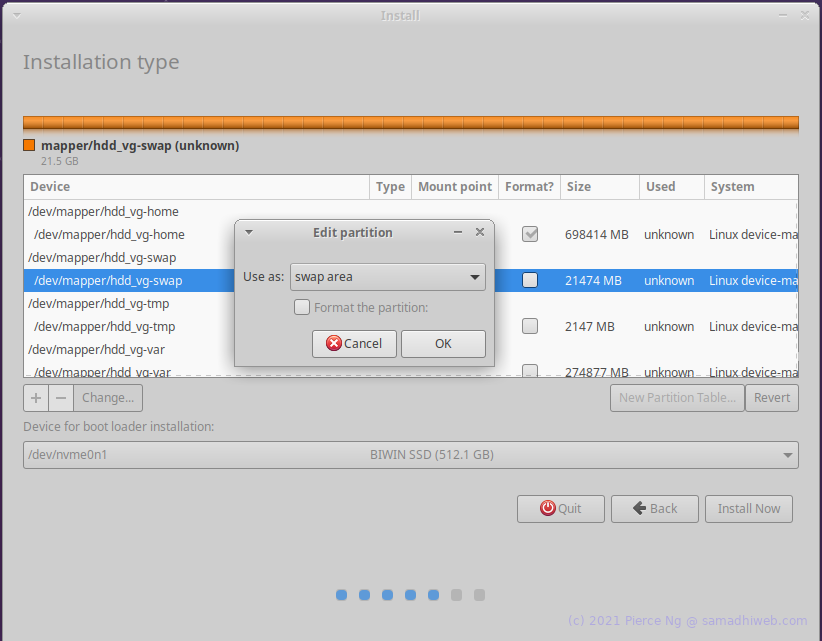
For swap:
For /tmp:
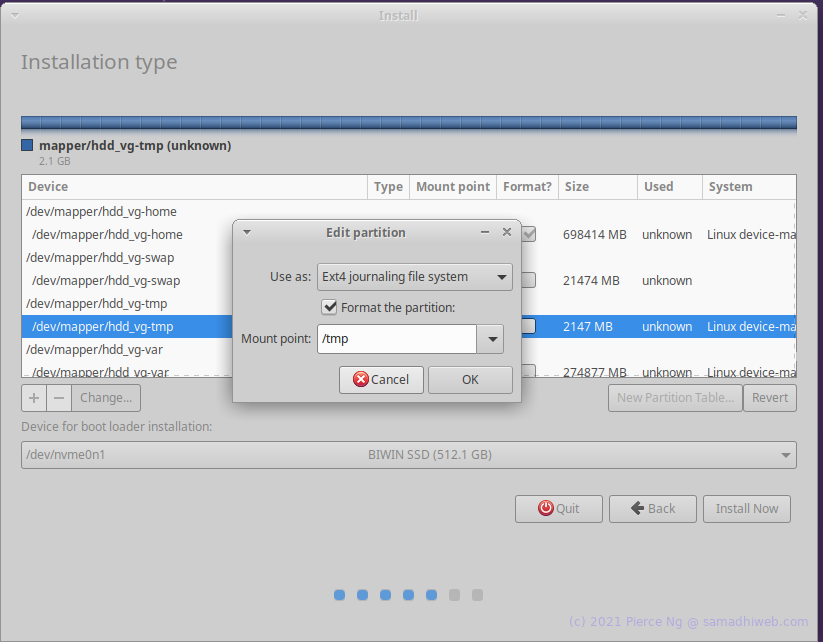
For /var:
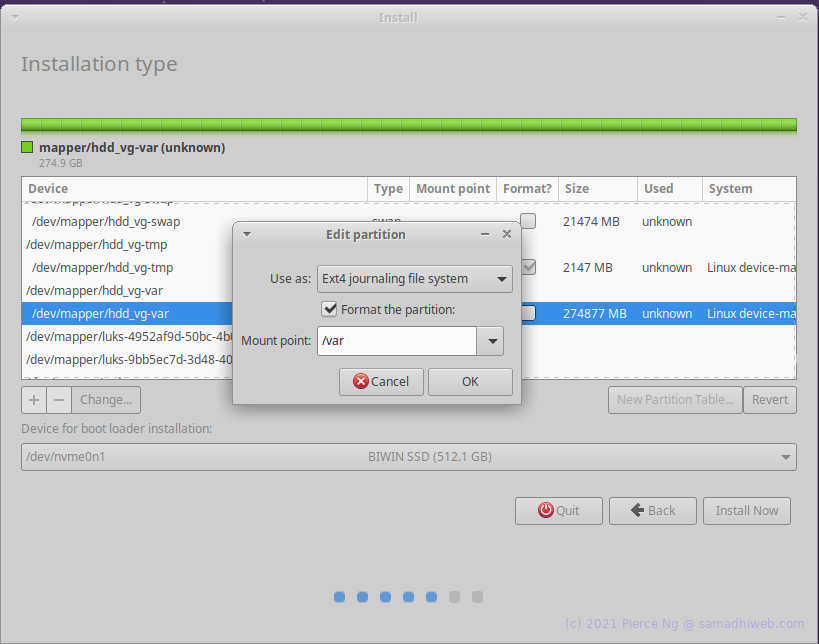
And on SSD, for /boot:
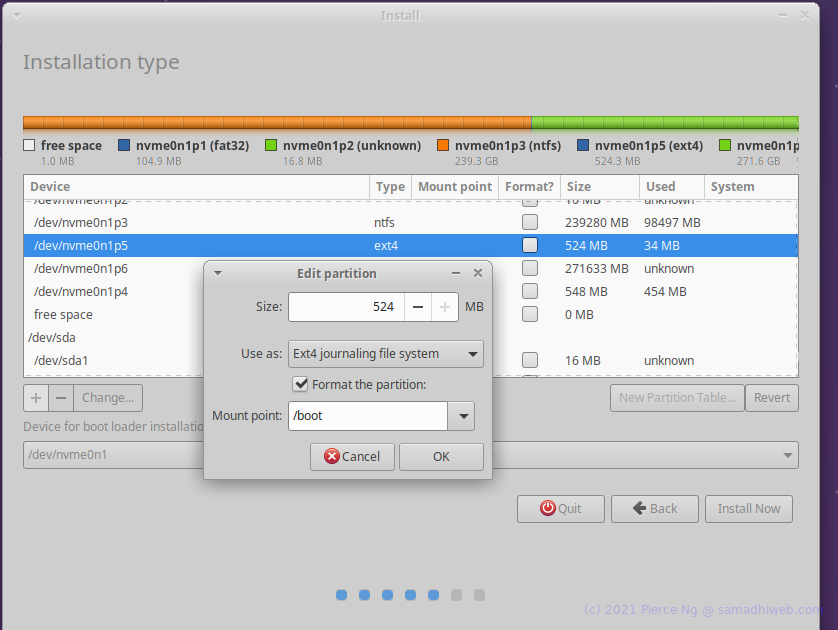
For root filesystem:
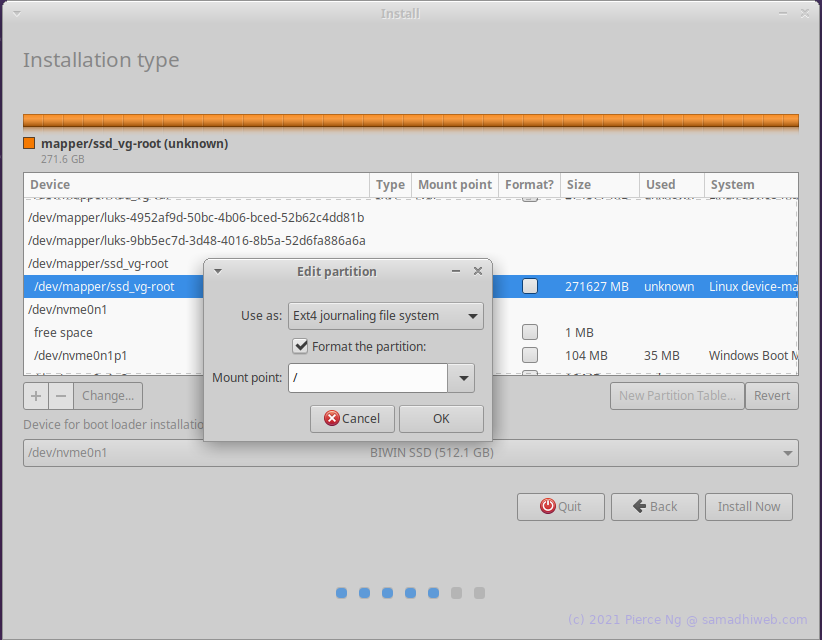
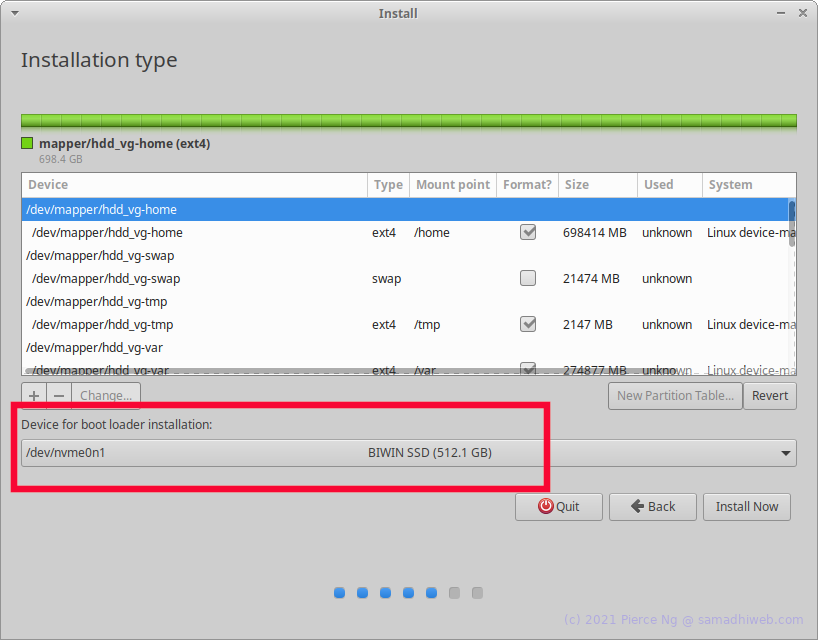
For "Device for boot loader installation", choose the SSD:
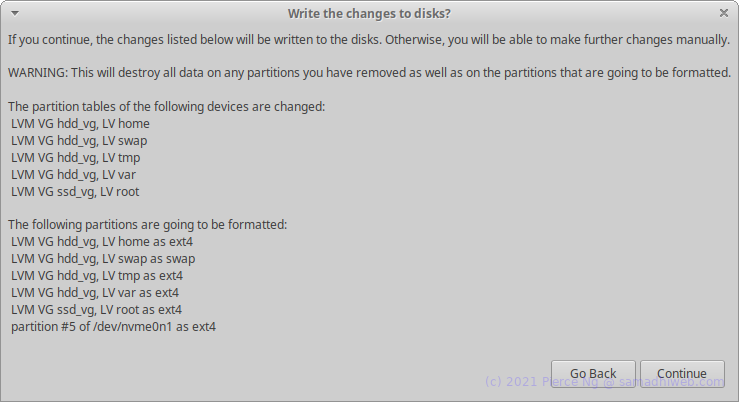
Click "Install Now". When prompted by the installer to write changes to disk, click "Continue".
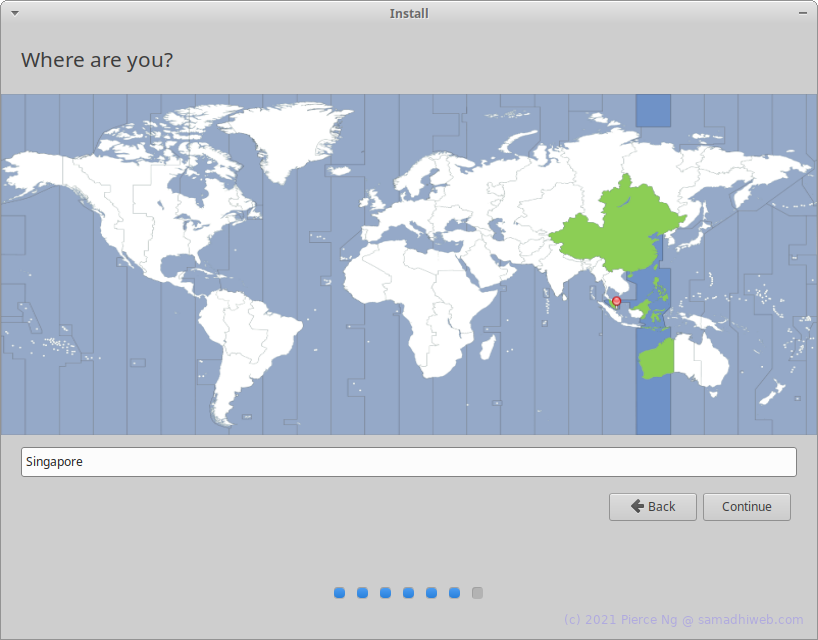
Next screen is the familiar timezone prompt. Set the timezone and click "Continue".
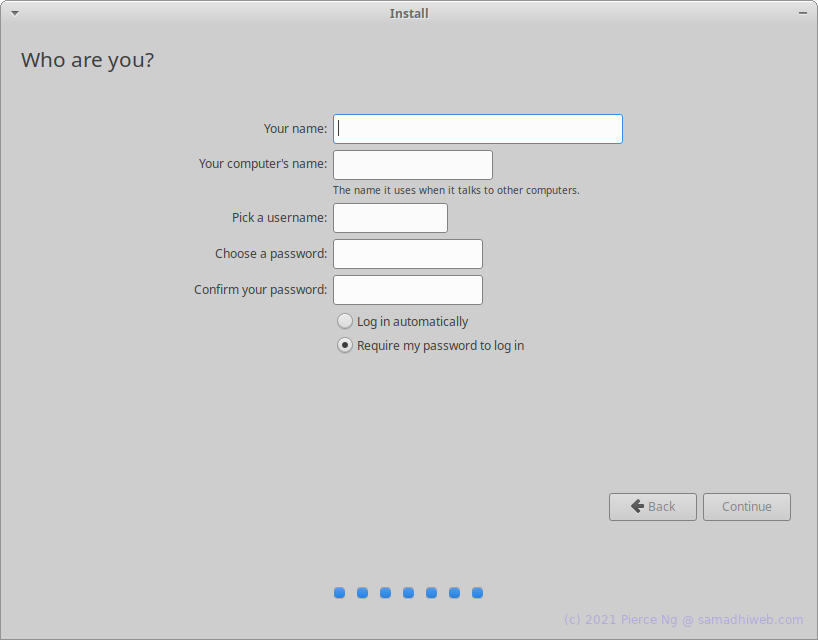
One more screen to go. Create a user for yourself. Click "Continue".
The installation proceeds:
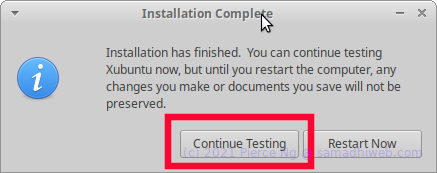
Finishing The Installation
When the installer finishes and presents the following prompt, do NOT click "Restart Now". Instead, click "Continue Testing". The installer exits.
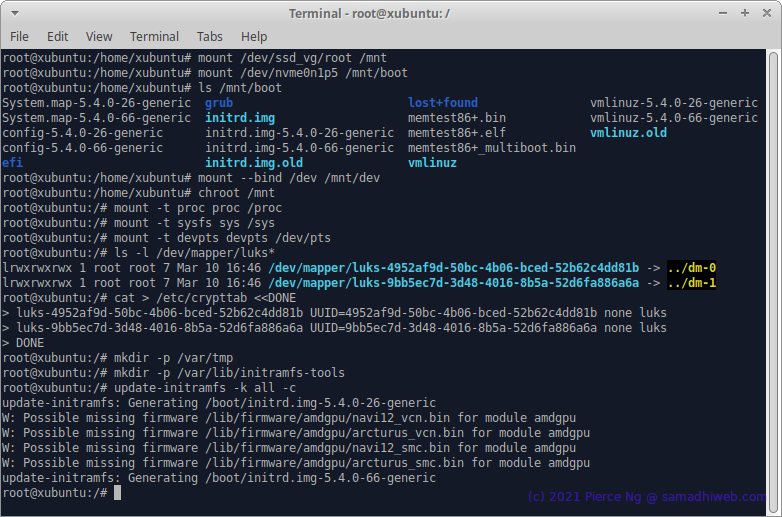
Go back to the root shell terminal, to set up /etc/crypttab that will
allow unlocking the LUKS encrypted partitions when Linux next boots. First,
mount /dev/ssd_vg/root /mnt. Then mount the boot filesystem:
mount /dev/nvme0n1p5 /mnt/boot. To confirm that the correct partition
has been mounted, ls /mnt/boot; the output should be similar to
following screenshot. Now bind-mount /dev by executing mount --bind /dev /mnt/dev.
Then, chroot /mnt, so that next commands operate on the mounted SSD
partitions. Execute these commands in turn to set up the chroot
environment.
mount -t proc proc /procmount -t sysfs sys /sysmount -t devpts devpts /dev/pts
Once again, ls -l /dev/mapper/luks* to confirm the UUIDs for the two
LUKS partitions. Set up /etc/crypttab, again replacing the "AAA-..."
and "XXX-..." placeholders below with the correct UUIDs:
root@xubuntu:/# cat > /etc/crypttab <<DONE
> luks-AAA-BBB-UUID-SSD UUID=AAA-BBB-UUID-SSD none luks
> luks-XXX-YYY-UUID-SSD UUID=XXX-YYY-UUID-SSD none luks
> DONE
root@xubuntu:/#
Almost done now. The final step is to set up initramfs:
root@xubuntu:/# mkdir -p /var/tmp
root@xubuntu:/# mkdir -p /var/lib/initramfs-tools
root@xubuntu:/# update-initramfs -k all -c
update-initramfs: Generating /boot/initrd.img-5.4.0-26-generic
<other output if any>
update-initramfs: Generating /boot/initrd.img-5.4.0-66-generic
<other output if any>
root@xubuntu:/#
Below screenshots captures these command line operations:
Reboot. Remove the USB drive containing the installer when prompted.
Dual Booting
The GRUB menu comes up, allowing to boot Ubuntu and Windows:
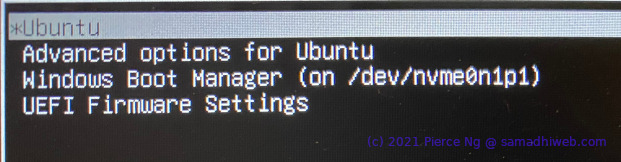
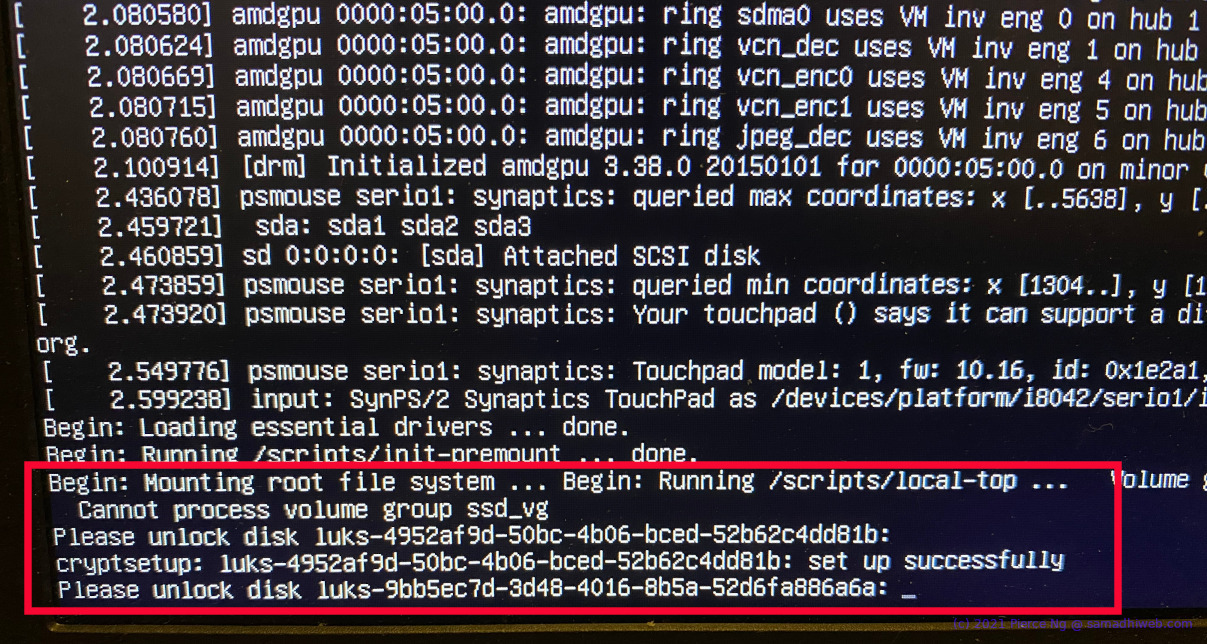
Boot Ubuntu. Here I'm booting without splash screen, to see the log messages as the system boots. At some point, I am prompted to enter the LUKS passphrases. Once the encrypted partitions are unlocked, booting continues, and presently the Xubuntu GUI appears.
Thus concludes the procedure to create two-disk LUKS-encrypting Xubuntu 20.04 dual-boot with Windows 10.